

Got Stuck at Booting with Raspberry Pi
My first blocker at building the AI robot.
I got myself a SunFounder PiDog and a Raspberry Pi 5 so I could build and program an interactive AI robot. When I received the kit, I looked at the printed manual. The manual had a diagram of all the parts that are required for the PiDog. What’s great about it is that the manual comes with an assembly option as the prerequisites: One for the Raspberry Pi Zero 2 W and one for Raspberry Pi 3/4/5.
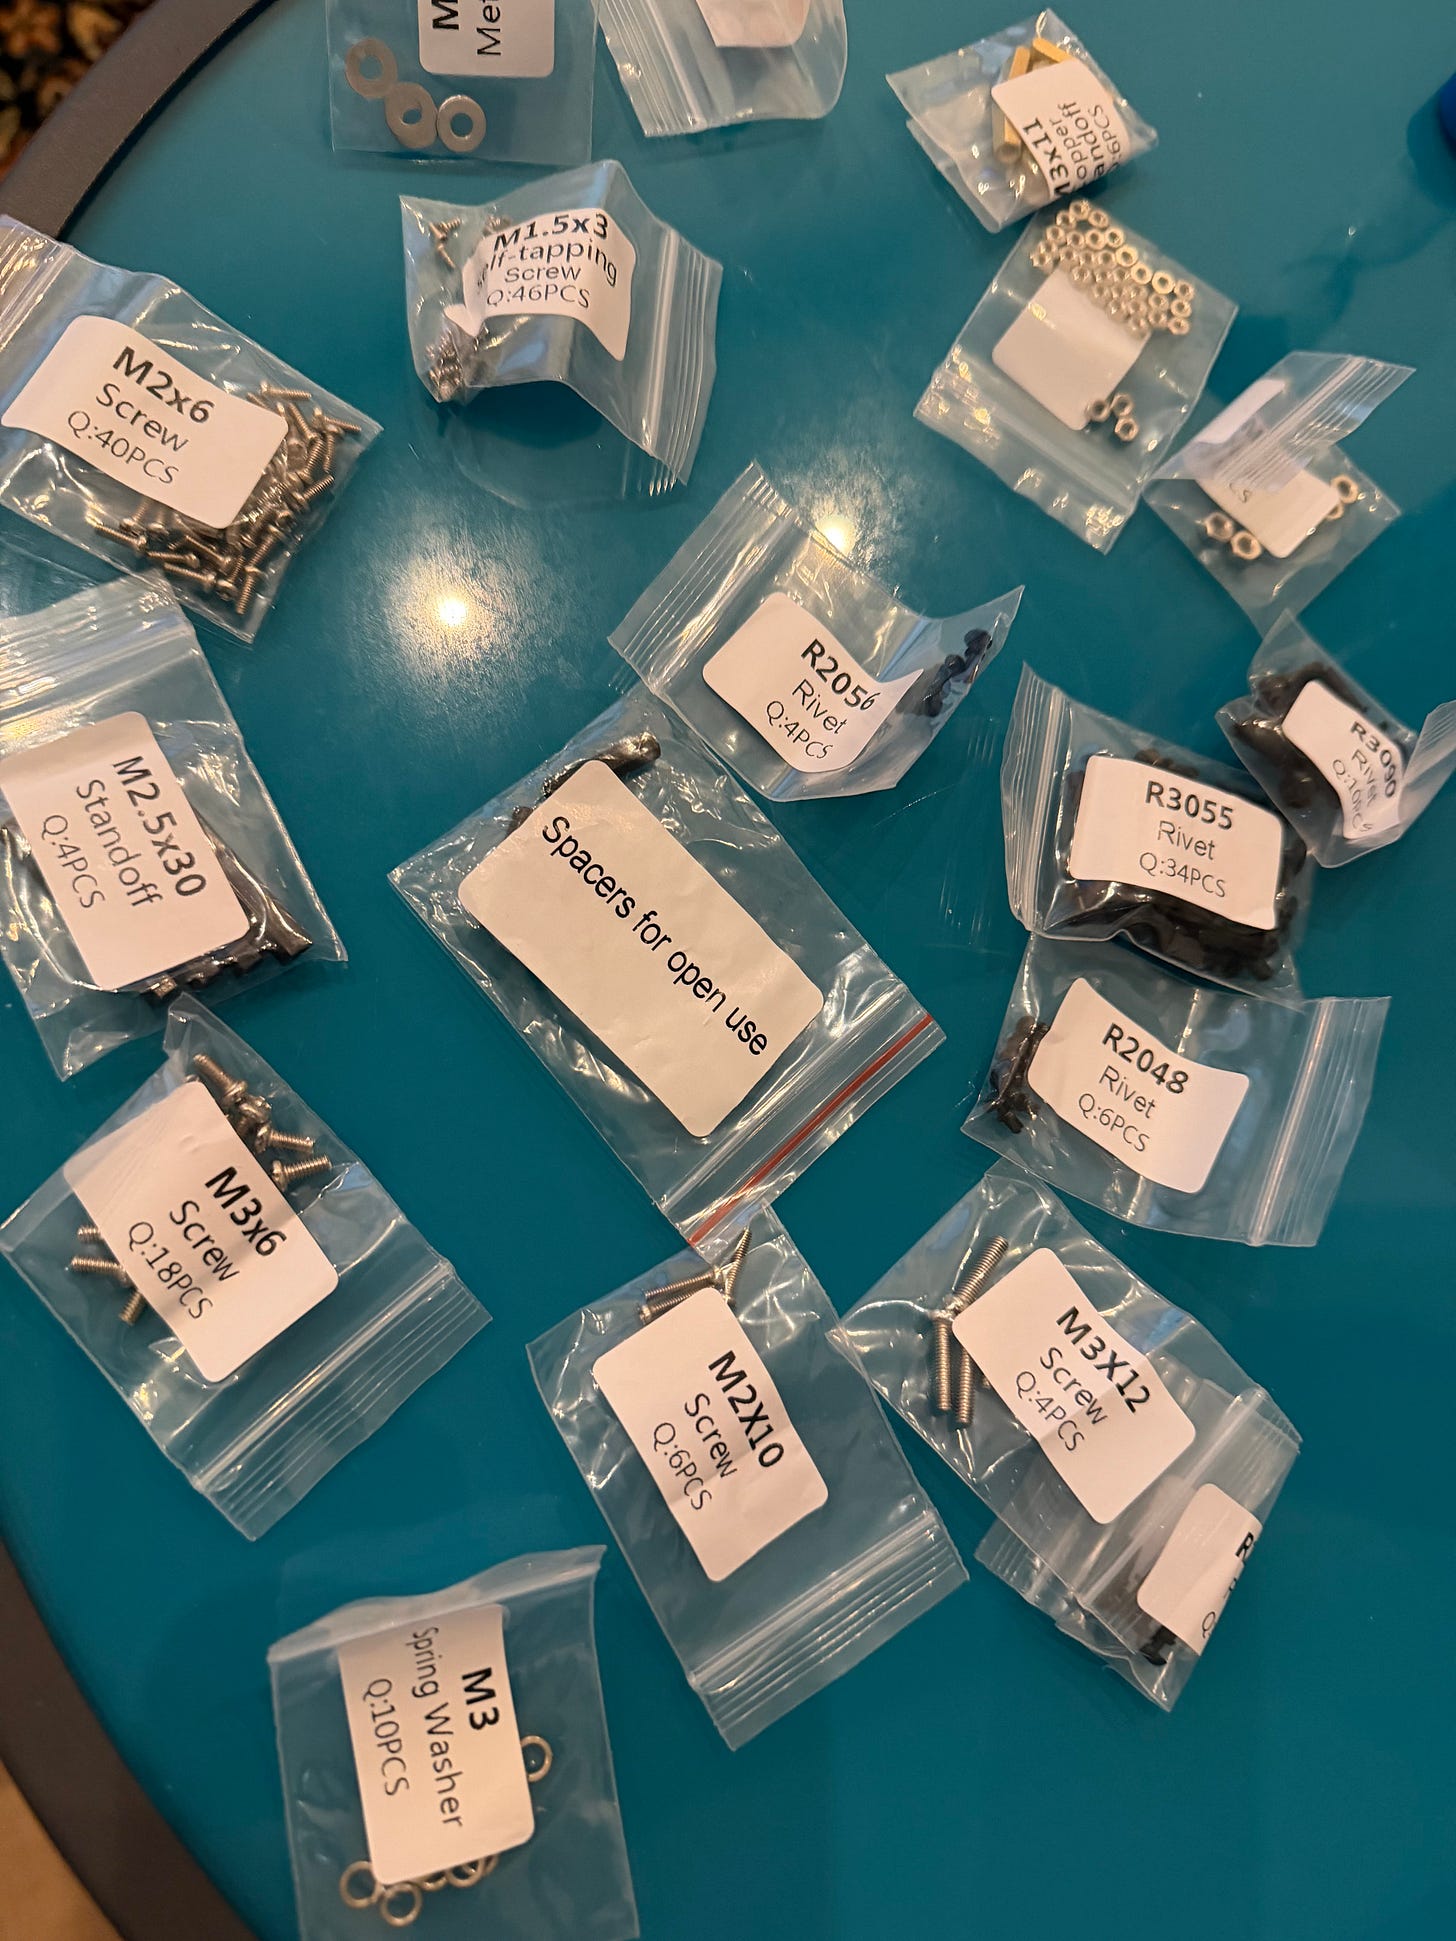
The first step was to arrange all the pieces on a flat surface. It helped me find the required items for each step.
Next, I checked the manual and followed the instructions for the Raspberry Pi 5.
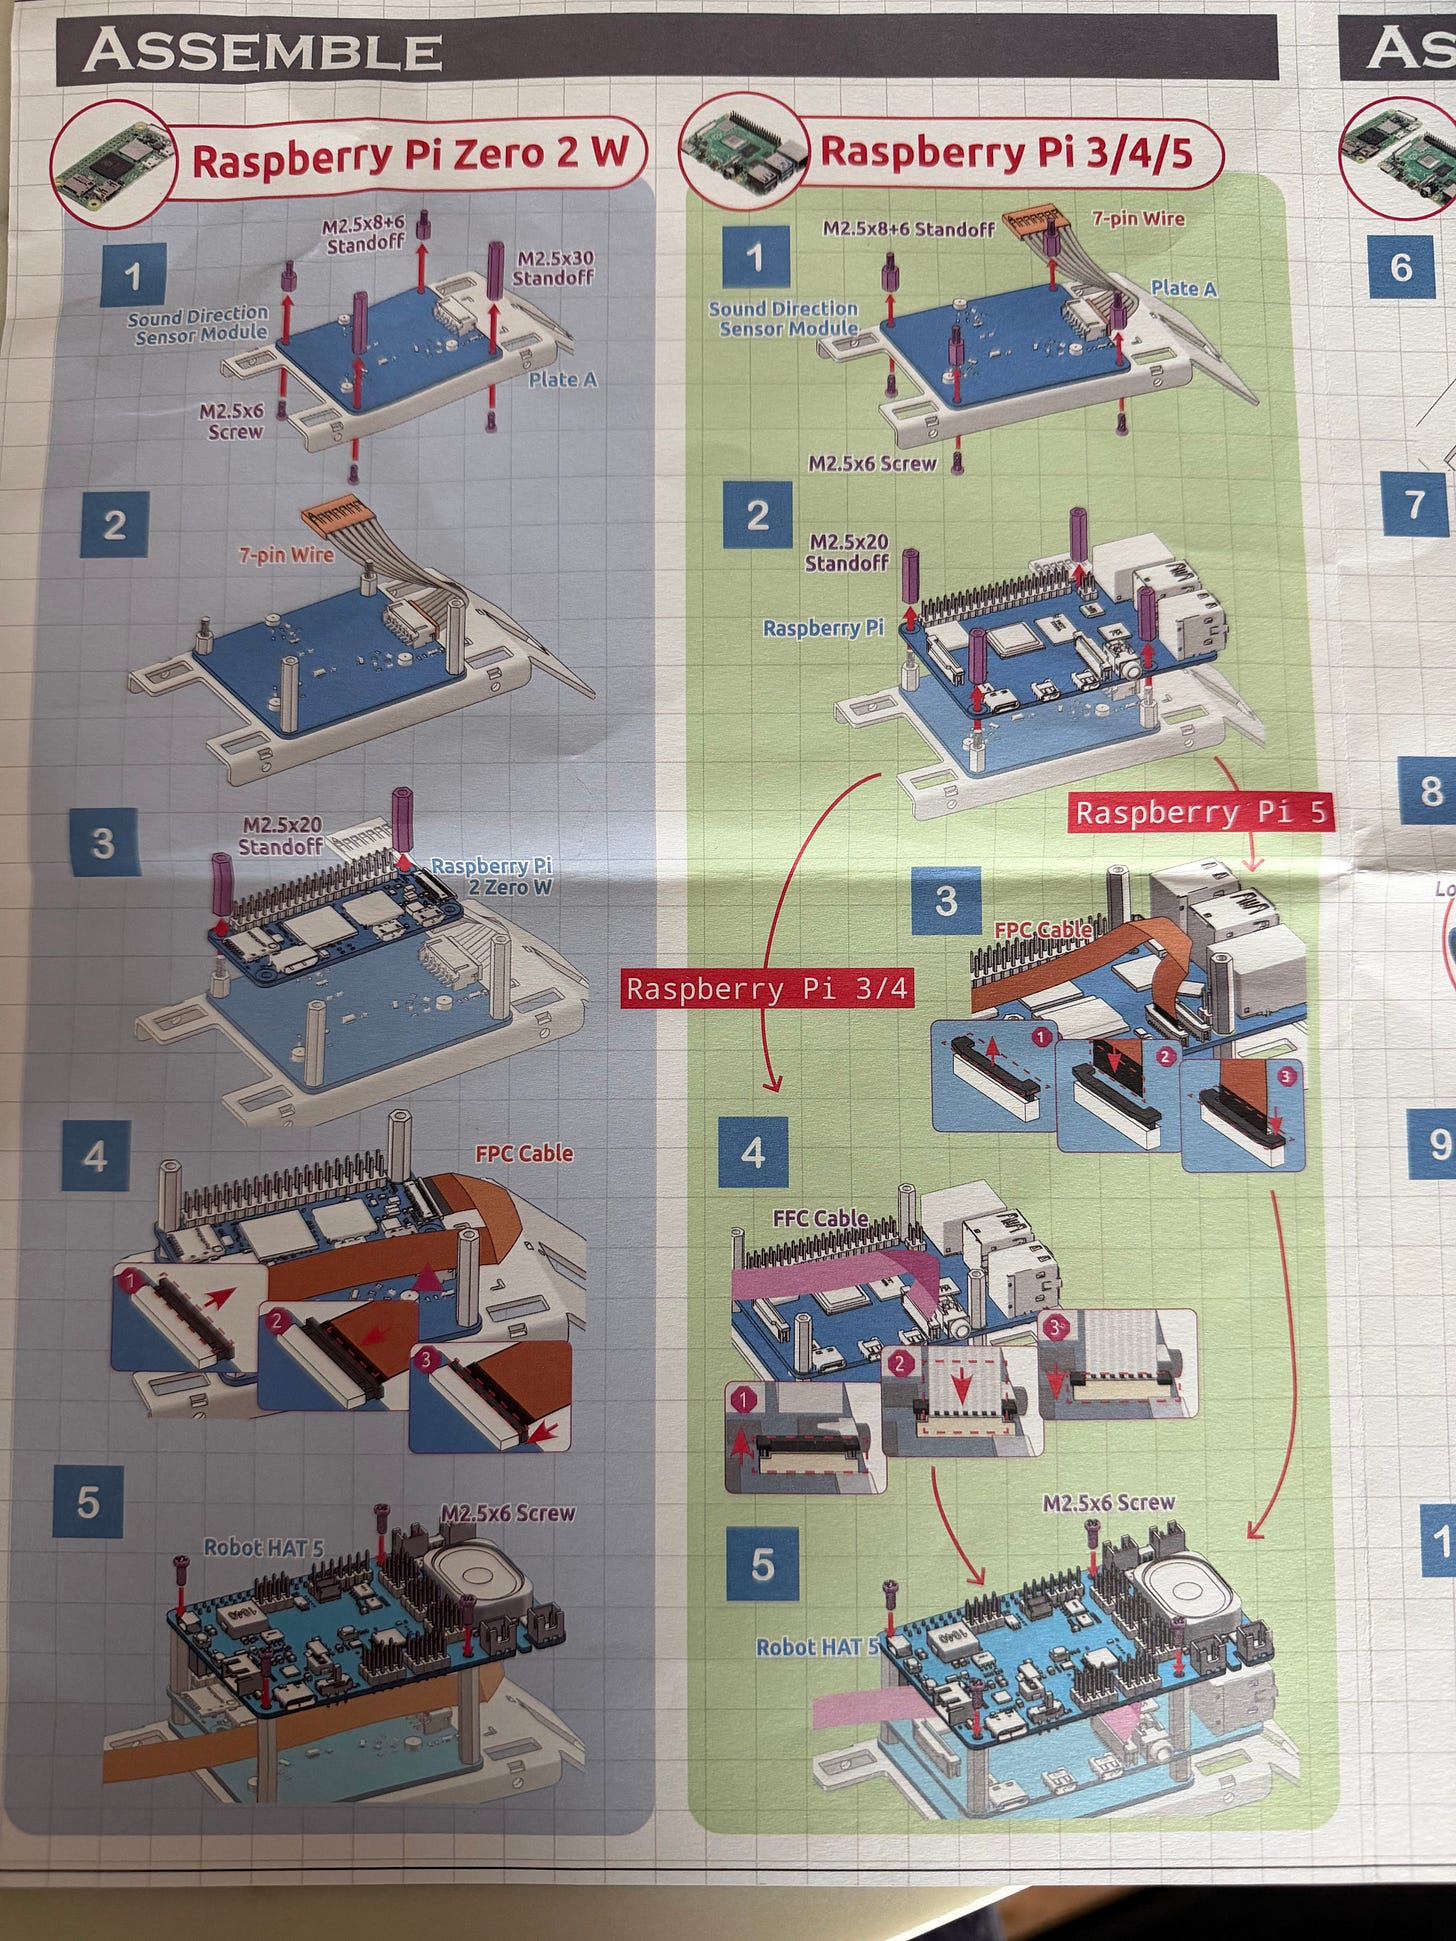
I went with the second option (Raspberry Pi 5) for assembly. After I completed steps 1 to 10, I struggled with completing step 11.
The manual instructed me to press the ZERO button to activate the servo calibration. However, in the video tutorials, it was suggested to first install the Raspberry Pi OS on the SD card, connect and boot the Raspberry Pi to the computer. What seemed like a straightforward process turned into a significant roadblock. I first followed step 11. With the conflicting information, I had to research and watch the video tutorials closely. Then I installed the Raspberry Pi 5 OS on the SD card.
One thing I could improve on the printed manual is to provide the link for the video tutorials. This step was essential and was missed on the manual:
Zeroing a Servo: Before fixing each servo, it needs to be zeroed first. The steps for zeroing are to first install the Raspberry Pi OS, then install the required modules, and then run a script (set the angle of all PWM pins to 0). After that, plug in the servo wire to zero the servo. (Source: Assemble Videos)
Because I missed that essential step, I was greeted with the “greenscreen” when I booted the Raspberry Pi to the computer. So, what happened? Here’s what I did to troubleshoot and unblock this step:
Insert the SD card to the SD card reader and connect it to the computer.
Use Misc Utility Images > Bootloader > SD Card Boot to repair it.
Reinstall the Raspberry Pi OS on the SD card. Wait for the installation to complete.
Insert the SD card to the Raspberry Pi 5.
Connect the Raspberry Pi to a monitor and keyboard/mouse.
Turn on the Raspberry Pi 5 and wait for it to boot.
After a successful boot, open the terminal and enter the following scripts for all modules.
Let it run.
After the scripts are updated, turn off the Raspberry Pi and then turn it on. The Raspberry Pi desktop appears.
Running these scripts helped clear the green screen and I had no further issues since then. If that doesn’t work and you still have the green screen, check the remote access settings (SSH). Thankfully, I didn’t have to do this step to resolve my issue.
It did take me a while to clear this step. I wish the link to the assembly videos had been listed on step 11 so others don’t spend too much time trying to figure out what they missed during the process. Now that I am unblocked, I can move on to calibrating the servos and continue building the robot. Stay tuned!
